> For the complete documentation index, see [llms.txt](https://docs.solmatebot.com/llms.txt). Markdown versions of documentation pages are available by appending `.md` to page URLs; this page is available as [Markdown](https://docs.solmatebot.com/web-dashboard/verification-setup.md).
# Verification Setup
The **Verification** tab on the dashboard lets you configure holder roles, refresh verifications, and export user data.
## Opening the Verification Tab
1. Go to [solmatebot.com/manage](https://solmatebot.com/manage)
2. Select your server
3. Click the **Verification** tab
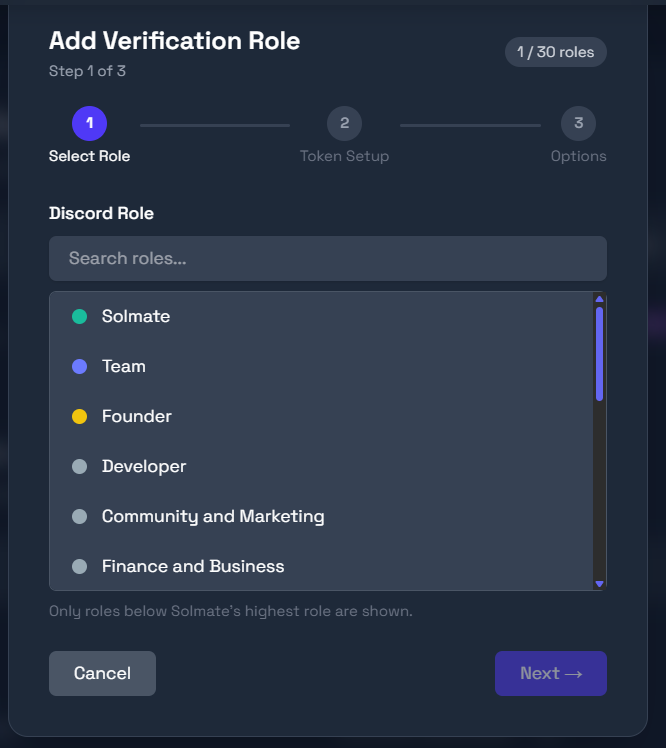
## Adding Verification Roles
1. Click **Add Role**
2. Choose how to identify the asset:
* **By Token ID** — enter a Solana or BNB contract address
* **By Collection Symbol** — enter a Solana NFT collection symbol
3. If using Token ID, select the **chain** (Solana or BNB)
4. The dashboard will auto-fetch the token/collection info for confirmation
5. Select the **Discord role** to assign
6. Configure requirements:
* **Wallet required** — user must have a verified wallet (always on)
* **Exempt from removal** — keep the role even if holdings change
* **Need all requirements** — user must meet all role requirements (for multi-requirement roles)
7. Click **Save**
Adding a verification role on the dashboard
### Address format
* **Solana:** Base58 format (32-44 characters)
* **BNB/EVM:** `0x` prefix + 40 hex characters
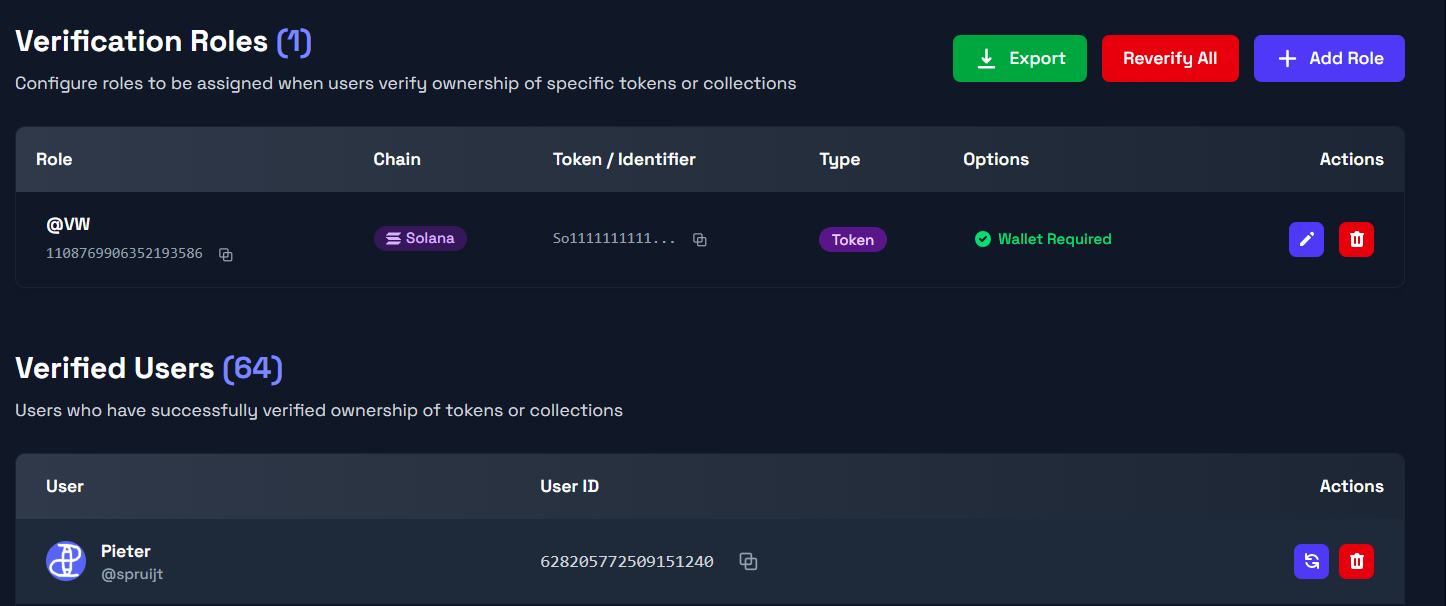
## Managing Roles
Each configured role shows:
* Role name with Discord role color
* Token/collection name and symbol
* Chain indicator (Solana or BNB)
* **Edit** and **Delete** buttons
Verification roles list
A progress bar shows how many roles you're using out of your plan's limit.
## Refreshing Verifications
Sometimes you may need to re-check all users' holdings:
* **Refresh one user:** Enter a Discord user to re-verify just that person
* **Refresh all users:** Re-verify everyone in the server
This is useful after changing role requirements or if roles seem out of sync.
## Exporting Data
Export all verification data as a downloadable file:
* **JSON** — structured data with all user details
* **TXT** — plain text list
The export includes Discord IDs, usernames, verified wallets, and role assignments.